Guide
How to set up a Discord ticket system
Right now people probably DM you for help, and you lose track of it. A ticket system gives each person a private channel instead — one your staff can see, and one that leaves a record you can look at later. This page shows you how to set one up, with a picture of every screen. It takes about ten minutes and works on the free plan.
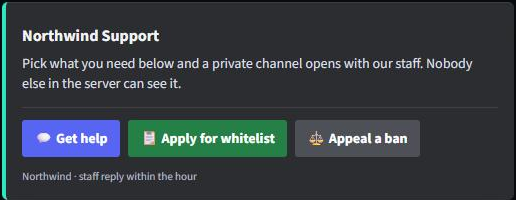
Before you start
Four things to have ready
Set these up in Discord first. It is much easier than stopping halfway through to make them.
- You need to be in charge of the server. That means you own it, or someone gave you the permission called Manage Server. We check this before letting you set anything up.
- A category for the tickets to go in. A category is the folder that channels sit under in your channel list. New ticket channels get made inside it.
- A staff role. A role is the label you give people, like "Support" or "Mod". Whoever has that role will be able to see and answer tickets, so make the role now and give it to your staff.
- A channel for saved conversations. When a ticket is closed, a copy of the whole conversation gets posted into a channel in your server. Most people use a staff-only channel for this.
Setup
Nine steps, with a picture of every screen
Add the bot to your Discord server
Click "Add TicketQuill to Discord" at the bottom of this page. Discord asks which server you want it in — pick your server from the dropdown and click Continue. You have to be the owner of that server, or have the permission called Manage Server. Nothing to pay and no card.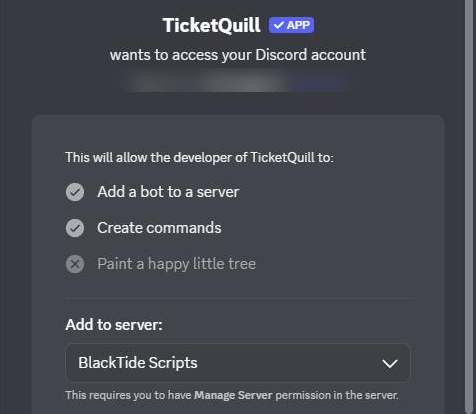
Discord asks which server. Pick yours, then click Continue. Sign in to the website with Discord
Go to ticketquill.com and click "Log in with Discord". There is no new password to make up. Discord just tells us who you are and which servers you are allowed to set up.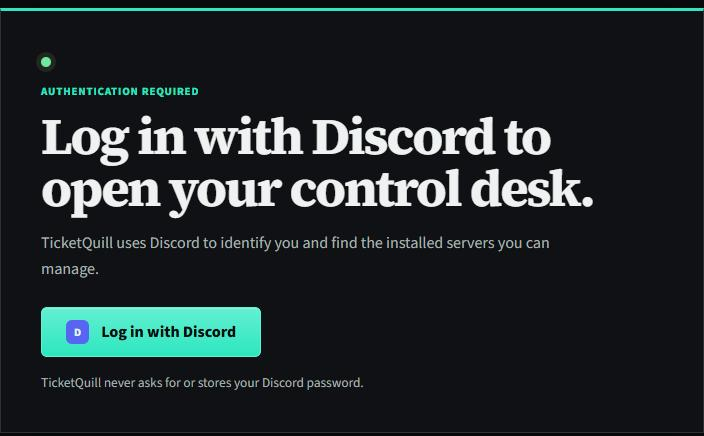
One button. There is no TicketQuill password to create. Find the three pages you will be using
Everything gets built on the website, down the left-hand menu. You only need three of them, and you use them in this order. Forms is where you write questions. Buttons is where you make the buttons people click. Panels is where you write the message that holds those buttons. None of it is live in Discord yet — you post it at the end with a command.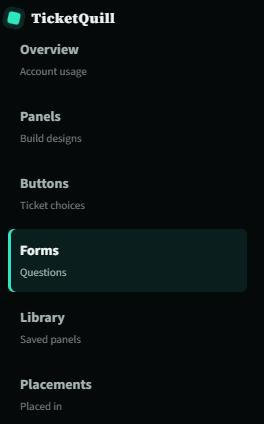
The left menu. Forms first, then Buttons, then Panels. Write your questions on the Forms page
Click Forms in the left menu. Any forms you already have are listed; scroll past them to "Create a form". Give it a name — the name is only ever seen by you. Then click "+ Add first question", type the question, pick what kind of answer you want, and click "Save questions" on the right. Skip this whole step if your buttons do not need to ask anything.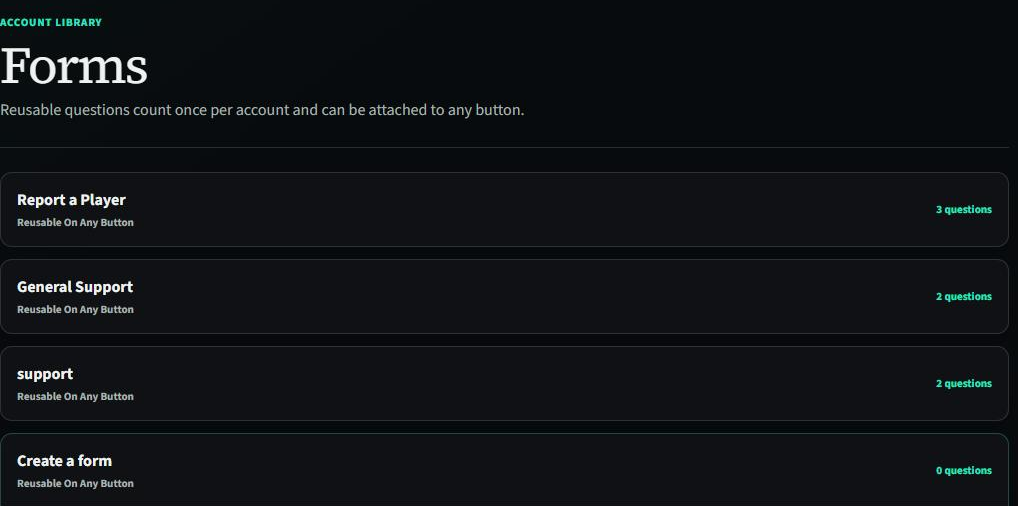
Forms you have already made are listed. "Create a form" is underneath them. 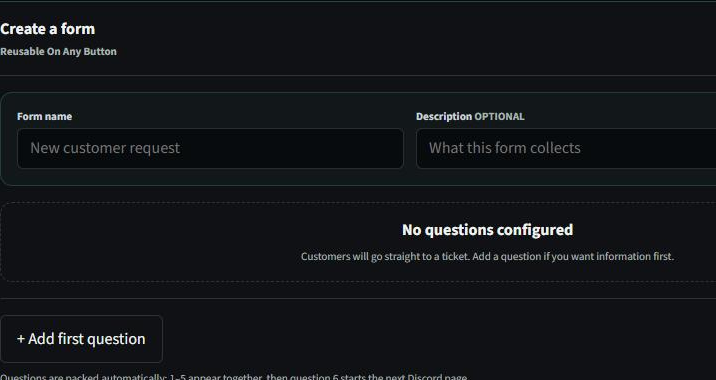
Name it, then click "+ Add first question". 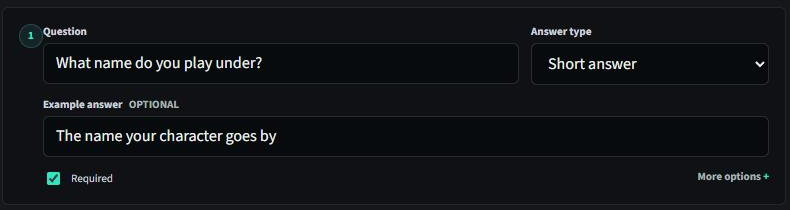
Each question has an answer type and an optional example. Discord shows up to five questions at a time. Make your buttons on the Buttons page
Click Buttons in the left menu, then "Create a new button". Give it a name — this one people DO see — and pick an emoji and a colour if you like. Make one button per kind of request: "Get help", "Apply for whitelist", "Appeal a ban". Keep them separate, because that is what lets you send each kind to different staff later. If this button should ask questions, tick "Attach a form" and pick the form you made. Click "Create button", then do the next one.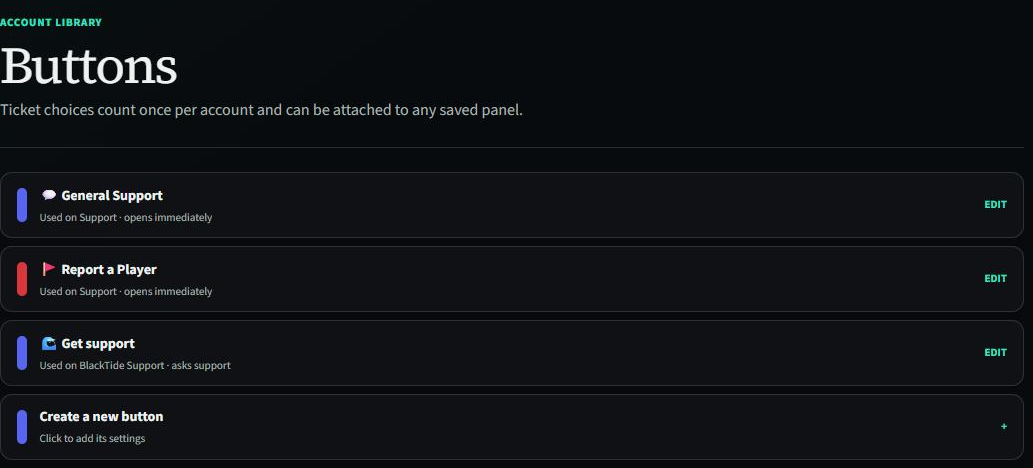
Your buttons. "Create a new button" at the bottom opens the settings. 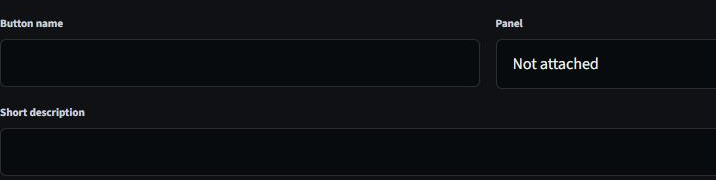
The name is what people see written on the button in Discord. 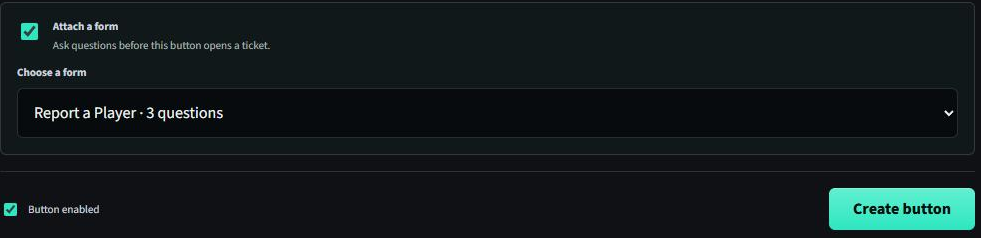
This is where questions get attached: tick "Attach a form", pick your form, then "Create button". Write the message people see on the Panels page
Click Panels, then "Create panel". A panel is the message that holds your buttons. Give it a name (only you see the name), then write the message your members read — say what happens after they click, and say that the channel which opens is private. Then go to step 2 of the builder, "Attach buttons", and add the buttons you just made.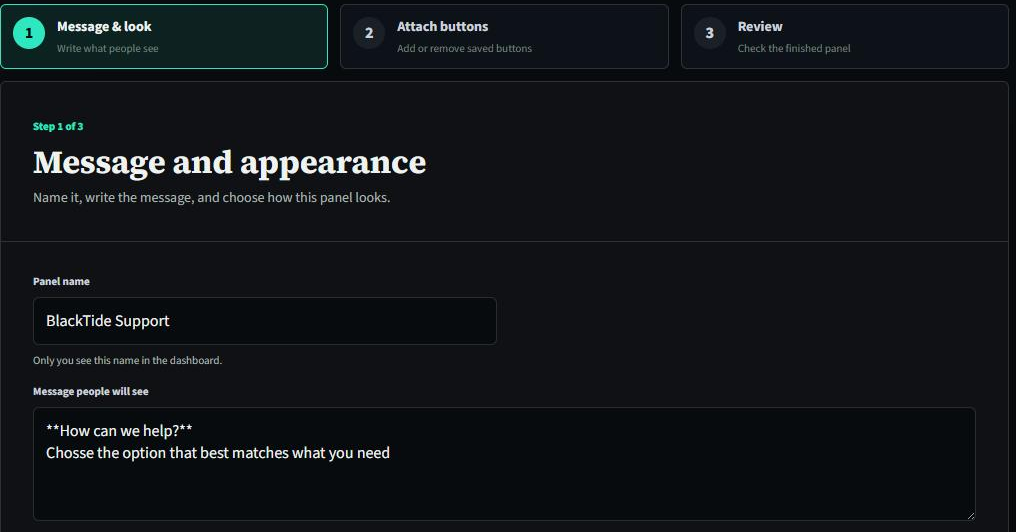
Step 1 of 3. The name is for you; the message is what your members read. 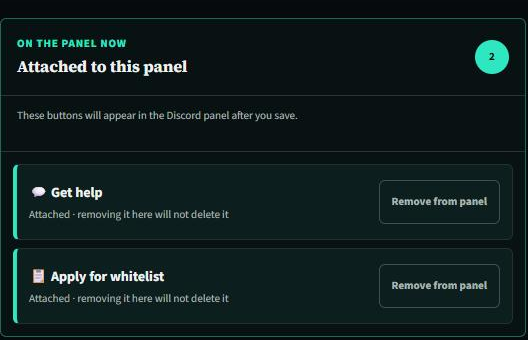
Step 2 of 3: add your buttons. Taking one off a panel does not delete it — it stays in your account for next time. Put the panel in a channel using /panel
Now go back to Discord and click the channel you want members to use. Type /panel in the message box, but do not press Enter yet. A list pops up — click the TicketQuill one. Two boxes appear: "design" is the panel you just made, "target" is the channel. Fill both, then press Enter. The bot posts your panel there.
Type /panel and this appears above the message box. Click it. 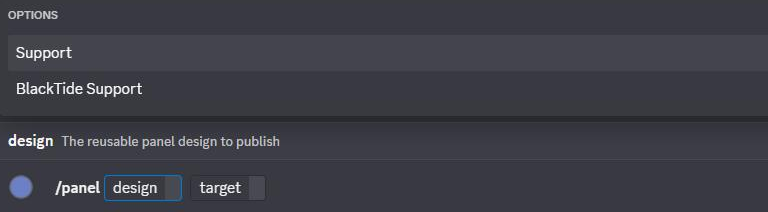
Then fill the boxes. Discord offers your saved panels — click one. Tell each button where its tickets go using /setup workflow
Type /setup workflow in any channel and click the TicketQuill one. Fill in four things: "ticket_type" is which button you are setting up, "category" is the folder the new ticket channels get made in, "transcript_channel" is where the saved copy of the conversation is sent when a ticket is closed, and "staff_role_1" is who is allowed to see and answer it. Press Enter. Then do it again for each button.
Type /setup workflow and click the TicketQuill one. 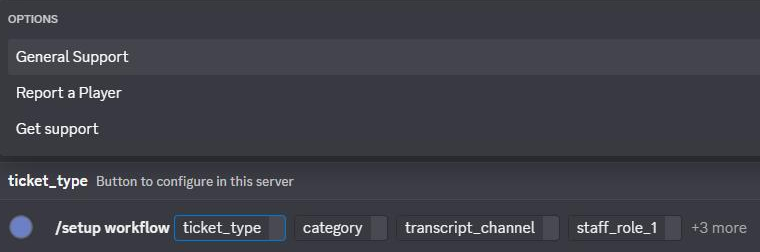
Discord fills in the choices for you. Click your button, then move to the next box. Open a ticket yourself to check it works
Click your own button, the way a member would. If you attached a form you get the questions first. A private channel should then open with your answers already in it and Claim and Close buttons at the bottom. Last thing: check an ordinary member cannot see it — easiest with a second account, or take your own staff role off for a minute and look again.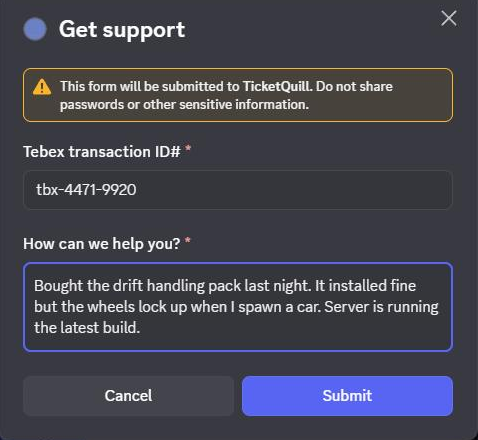
The questions come first, as a pop-up. 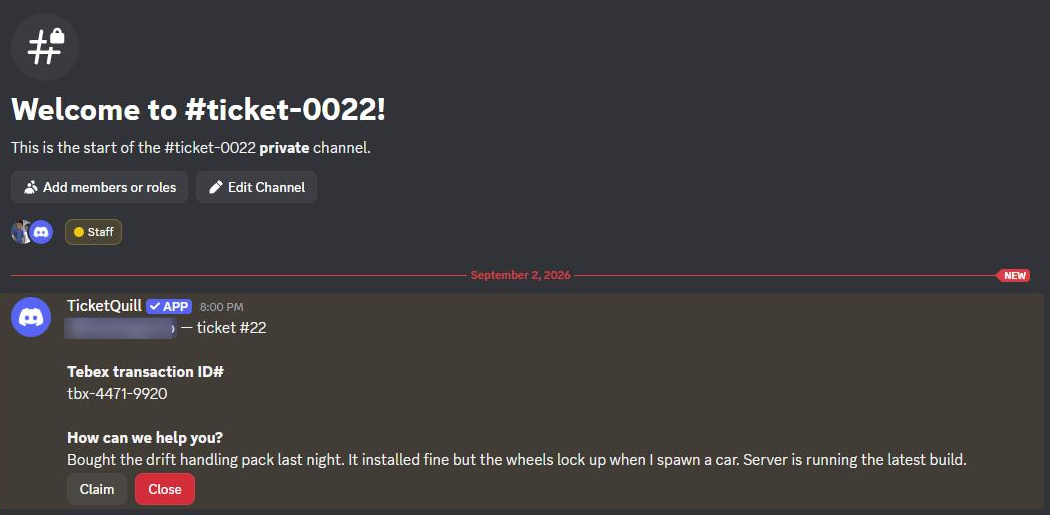
Then the private channel opens, with the answers already in it and Claim and Close for your staff.
Reference
Every box the two commands ask you for
You only need two commands, and Discord fills in most of the choices for you. This is what each box means if you get stuck.
| Command | Box | What to put in it |
|---|---|---|
/panel | design | The panel you built on the website. |
target | The channel your members will click the buttons in. | |
/setup workflow | ticket_type | Which button you are setting up right now. |
category | The folder new ticket channels get created in. | |
transcript_channel | Where the saved copy is posted when a ticket is closed. | |
staff_role_1 … staff_role_3 | Who is allowed to see and answer it. You need at least one; you can add up to three. | |
ping_role | Optional. Who gets notified the moment one of these opens. | |
/subscribe | — | See the plans and upgrade. You do not need this to follow the guide. |
Common mistakes
Four things people get wrong the first time
- Putting everything on one button. If you only have a "Support" button, every request lands in the same place. You cannot send appeals to your mods and billing questions to an admin. Split them up before you post the panel.
- The category is not private. Tickets are only private because the category they sit in is private. If a normal member can see that category, they can read other people's tickets. Check it.
- No channel picked for saved conversations. Without one, closing a ticket throws the conversation away. There is nothing to look back at.
- Only testing it on yourself. Your own account can see everything, so it proves nothing. Use a second account, or take your staff role off for a minute and look again.
Free plan, no card
Set it up while this page is open.
Everything on this page works on the free plan, in as many servers as you like, with saved conversations delivered to your own Discord.